
XSLT, or Extensible Stylesheet Language Transformations, is the evolution of the former and simpler Extensible Stylesheet Language (XSL) standard. These two standards serve different purposes and one point to remember is that XSL is now referred to as XSL-FO, for Extensible Stylesheet Language – Formatting Objects, and its future is rather uncertain as its functionality overlaps with that of HTML tags and CSS. XSL-FO deals with the representation of data. You could visualise it as CSS for the XML. That’s not entirely true but it should suffice to give you an idea of how it’s different from XSLT.
Extensible Stylesheet Language Transformations -XSLT- is more than simply representing the data. Although it does indeed provide just about the same formatting options with XSL, it is in fact more interested in the exchange of data rather than its representation.
XSLT is in fact an XML document, which parses an XML document into a tree of nodes and then converts the source tree into a result tree.
XSLT is a programming language that supports:
1. a small set of data types: Boolean, number, string, node-set and external objects.
2. a full set of operations: <xsl:template>, <xsl:apply-template>, <xsl:sort>, <xsl:output>, etc.
3. programmatic flow of control: <xsl:if>, <xsl:for-each>, <xsl:choose>, etc.
XSLT adopts the XPath language syntax for expressions but there’s also built-in and custom extension functions for building expressions for XML data queries and transformations. For a complete list of XSLT Reference and XPath Reference click on the respective links.
For an example you could do the following. Fire up your Visual Studio and select New ASP.NET project. Add a New File, XML to it and another one, XSLT:
1. in your XML file (let’s call it HelloWorld.xml, just as in the MSDN example) add a simple pair of XML tags to describe our Hello World salutation. Add a “greeter” and a “salutation” tags, inside a helloWorld tag. (the first line with the version is already provided by Visual Studio. Don’t worry if you don’t get the encoding parameter. It’s only there cause I’m not on a natively English system).
<?xml version=”1.0″ encoding=”utf-8″ ?>
<helloWorld>
<salutation>Hello World…</salutation>
<greeter>…an XSLT Developer!</greeter>
</helloWorld>
2. in your XSLT file (let’s call it HelloWorld.xslt), you need to define how the data from your XML file is going to appear. Ignore the first lines (grayed out) that appear automatically when you create an XSLT file. In the “xsl:template-match=” you need to provide the name of the XML node in your XML file. If you followed the code above, the tag should read “helloWorld”. Then, you obviously start building an HTML page. You will need to provide the full code, including the <html>and <head>, <body> tags. Notice how trivially easy it is to pass the values from the XML to the page.
If you need to simply output the value, you will use the <xsl:value-of select=”xxx”/> tag. This will parse the XML and find the value of the tag inside your matched template node and output its value.
If you need to output a value but in a specific format, you will need to define the style. This is achieved in two stages. First you enter the tag <xsl:apply-templates select=”xxx”></xsl:apply-templates> at the location where you want to output the value. Notice that the xxx value in select=”xxx” will be the name of the node in your XML file. Then, after the end of your </xsl:template> tag, you will provide the style. You do so in an <xsl:template-match=”xxx”> tag where xxx is again, the name of the XML node.
<?xml version=”1.0″ encoding=”utf-8″?>
<xsl:stylesheet version=”1.0″ xmlns:xsl=”http://www.w3.org/1999/XSL/Transform”
xmlns:msxsl=”urn:schemas-microsoft-com:xslt” exclude-result-prefixes=”msxsl”>
<xsl:output method=”xml” indent=”yes”/>
<xsl:template match=”helloWorld | node()”>
<HTML>
<Head>
<Title>Hello World</Title>
</Head>
<body>
<H1>
<xsl:value-of select=”salutation”/>
</H1>
<xsl:apply-templates select=”greeter”></xsl:apply-templates>
</body>
</HTML>
</xsl:template>
<xsl:template match=”greeter”>
<DIV>from <I>
<xsl:value-of select=”.”/>
</I>
</DIV>
</xsl:template>
</xsl:stylesheet>
3. In order to display your data, go back to your asp.net page, in code view and add this line: <asp:Xml runat=server ID=HelloWorld DocumentSource=”~/HelloWorld.xml” TransformSource=”~/HelloWorld.xslt”></asp:Xml>
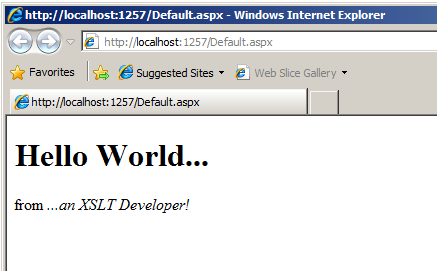
Alternatively, you can just add the <asp:Xml runnat=”server” ID=HelloWorld> in your aspx page, change view to design, right click on the Xml control and click on properties to use the DocumentSource and TransformSource parameters to locate your XML and XSLT files respectively. Hit F5 for debug and you’ll get the following:
*note for the beginner developer: always consult with the MSDN website when you need information on some programmatic question you might have ( http://www.msdn.microsoft.com )*


[…] For a quick introduction to Extensible Styleshee Language Transformations you might want to check my introductory post here. […]